helloworld

目前分類:資料庫 (45)

瀏覽方式: 標題列表 簡短摘要

編輯 /etc/yum.repos.d/mongodb.repo
# vi /etc/yum.repos.d/mongodb.repo
[mongodb-org-4.0]
name=MongoDB Repository
baseurl=https://repo.mongodb.org/yum/redhat/$releasever/mongodb-org/4.0/x86_64/
gpgcheck=1
enabled=1
gpgkey=https://www.mongodb.org/static/pgp/server-4.0.asc

透過 yum 安裝
# yum -y install mongodb-org

手動啟動 mongodb
# systemctl start mongod.service    // For CentOS 7 
# service mongod restart            // For CentOS 6/5 

設定下次重開機後自動啟動
# systemctl enable mongod.service    // For CentOS 7 
# chkconfig mongod on                // For CentOS 6/5 

測試登入
# mongo

預設 LISTEN 本機的 tcp/27017
tcp        0      0 127.0.0.1:27017         0.0.0.0:*               LISTEN

undefined
7天學會大數據資料處理—NoSQL(第三版):MongoDB入門與活用

作者: 黃士嘉, 林敬傑  
出版社:博碩

文章標籤

helloworld 發表在 痞客邦 留言(0) 人氣()

首先先找一下預設密碼是什麼
新版的mysql root 預設密碼已經不是空值
而是在第一次啟動時給予一個亂數字串

[root@pxc-example ~]# grep password /var/log/mysqld.log
2019-08-28T06:03:02.554033Z 1 [Note] A temporary password is generated for root@localhost: PrA!OOXXC3ir

預設使用mysqladmin 會出現以下錯誤
[root@pxc-example ~]# mysqladmin -u root -p password 'XXXXXX'
Enter password:
mysqladmin: [Warning] Using a password on the command line interface can be insecure.
Warning: Since password will be sent to server in plain text, use ssl connection to ensure password safety.
mysqladmin: unable to change password; error: 'Percona XtraDB Cluster doesn't allow use of CURRENT_USER/USER function for USER operation while operating in cluster mode'

可以利用 mysql client 修改
[root@pxc-example ~]#  mysql -u root -p
Enter password:
Welcome to the MySQL monitor.  Commands end with ; or \g.
Your MySQL connection id is 15
Server version: 5.7.26-29-57-log

Copyright (c) 2009-2019 Percona LLC and/or its affiliates
Copyright (c) 2000, 2019, Oracle and/or its affiliates. All rights reserved.

Oracle is a registered trademark of Oracle Corporation and/or its
affiliates. Other names may be trademarks of their respective
owners.

Type 'help;' or '\h' for help. Type '\c' to clear the current input statement.

mysql> ALTER USER 'root'@'localhost' IDENTIFIED BY 'NEW-Password';
Query OK, 0 rows affected (0.00 sec)

mysql> FLUSH PRIVILEGES;
Query OK, 0 rows affected (0.01 sec)

undefined
MySQL新手入門超級手冊-第二版(適用MySQL 8.x與MariaDB 10.x)

作者: 張益裕  
出版社:碁峰

文章標籤

helloworld 發表在 痞客邦 留言(0) 人氣()

CentOS 6 或更早版本
[root@pxc-01 ~]# /etc/init.d/mysql bootstrap-pxc
或是
[root@pxc-01 ~]# /etc/init.d/mysql start --wsrep-cluster-address="gcomm://"

CentOS 7
[root@pxc-01 ~]# systemctl start mysql@bootstrap.service

undefined
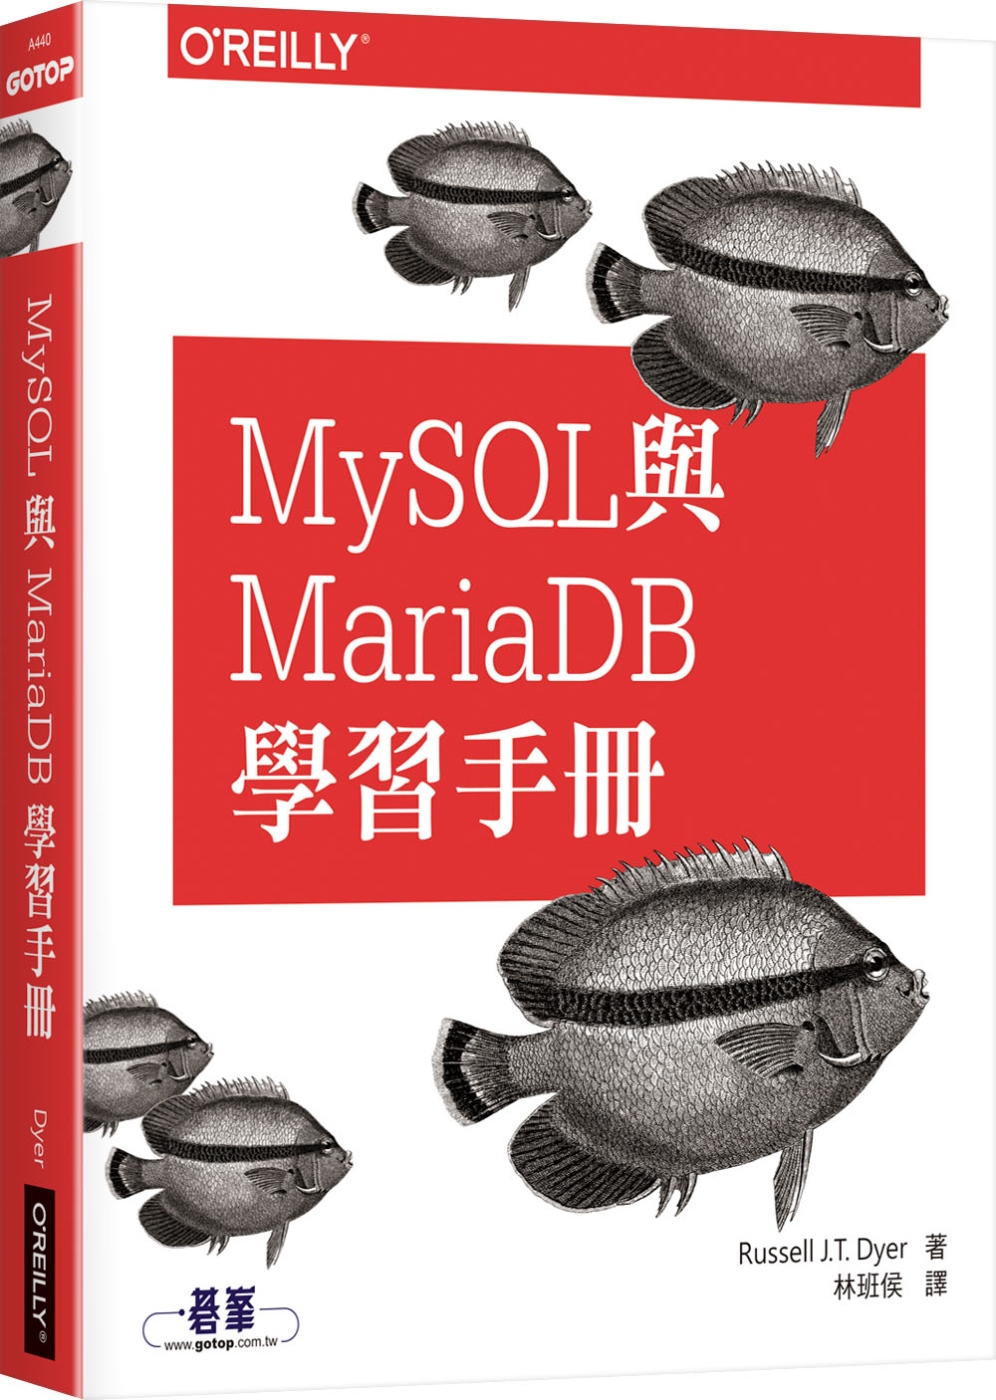
MySQL與MariaDB學習手冊
Learning MySQL and MariaDB

作者: Russell J.T. Dyer  
譯者: 林班侯
出版社:歐萊禮  

文章標籤

helloworld 發表在 痞客邦 留言(0) 人氣()

#安裝mysql server
apt install mysql-server

#初始設定
mysql_secure_installation

#登入 mysql
mysql

select * from mysql.user;
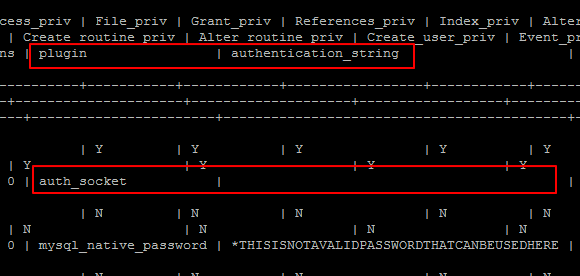
會發現 root@localhost 的密碼是空的,pluging 的欄位是 auth_socket 而非 mysql_native_password

#修改 root 密碼
ALTER USER 'root'@'localhost' IDENTIFIED WITH mysql_native_password BY 'PPPPP';

重新檢查 select * from mysql.user;
此時的 plugin 應該是 mysql_native_password ,密碼也是剛剛加密過的字串

跳出mysql , 重新登入測試
 

helloworld 發表在 痞客邦 留言(0) 人氣()

安裝 percona-release-lastest.noarch.rpm
[root@pxc57 ~]# yum install 'https://repo.percona.com/yum/percona-release-latest.noarch.rpm'

看看提供哪些套件
[root@pxc57 ~]# sudo yum list | grep percona

安裝Percona-XtraDB-Cluster-57
[root@pxc57 ~]# yum install Percona-XtraDB-Cluster-57

Installed:
 Percona-XtraDB-Cluster-57.x86_64 0:5.7.21-29.26.1.el7 Percona-XtraDB-Cluster-shared-57.x86_64 0:5.7.21-29.26.1.el7 Percona-XtraDB-Cluster-shared-compat-57.x86_64 0:5.7.21-29.26.1.el7

Dependency Installed:
 Percona-XtraDB-Cluster-client-57.x86_64 0:5.7.21-29.26.1.el7 Percona-XtraDB-Cluster-server-57.x86_64 0:5.7.21-29.26.1.el7 libaio.x86_64 0:0.3.109-13.el7 libev.x86_64 0:4.15-7.el7
 lsof.x86_64 0:4.87-5.el7 percona-xtrabackup-24.x86_64 0:2.4.11-1.el7 perl.x86_64 4:5.16.3-292.el7 perl-Carp.noarch 0:1.26-244.el7
 perl-Compress-Raw-Bzip2.x86_64 0:2.061-3.el7 perl-Compress-Raw-Zlib.x86_64 1:2.061-4.el7 perl-DBD-MySQL.x86_64 0:4.023-6.el7 perl-DBI.x86_64 0:1.627-4.el7
 perl-Data-Dumper.x86_64 0:2.145-3.el7 perl-Digest.noarch 0:1.17-245.el7 perl-Digest-MD5.x86_64 0:2.52-3.el7 perl-Encode.x86_64 0:2.51-7.el7
 perl-Exporter.noarch 0:5.68-3.el7 perl-File-Path.noarch 0:2.09-2.el7 perl-File-Temp.noarch 0:0.23.01-3.el7 perl-Filter.x86_64 0:1.49-3.el7
 perl-Getopt-Long.noarch 0:2.40-3.el7 perl-HTTP-Tiny.noarch 0:0.033-3.el7 perl-IO-Compress.noarch 0:2.061-2.el7 perl-Net-Daemon.noarch 0:0.48-5.el7
 perl-PathTools.x86_64 0:3.40-5.el7 perl-PlRPC.noarch 0:0.2020-14.el7 perl-Pod-Escapes.noarch 1:1.04-292.el7 perl-Pod-Perldoc.noarch 0:3.20-4.el7
 perl-Pod-Simple.noarch 1:3.28-4.el7 perl-Pod-Usage.noarch 0:1.63-3.el7 perl-Scalar-List-Utils.x86_64 0:1.27-248.el7 perl-Socket.x86_64 0:2.010-4.el7
 perl-Storable.x86_64 0:2.45-3.el7 perl-Text-ParseWords.noarch 0:3.29-4.el7 perl-Time-HiRes.x86_64 4:1.9725-3.el7 perl-Time-Local.noarch 0:1.2300-2.el7
 perl-constant.noarch 0:1.27-2.el7 perl-libs.x86_64 4:5.16.3-292.el7 perl-macros.x86_64 4:5.16.3-292.el7 perl-parent.noarch 1:0.225-244.el7
 perl-podlators.noarch 0:2.5.1-3.el7 perl-threads.x86_64 0:1.87-4.el7 perl-threads-shared.x86_64 0:1.43-6.el7 qpress.x86_64 0:11-1.el7
 rsync.x86_64 0:3.1.2-4.el7 socat.x86_64 0:1.7.3.2-2.el7

Replaced:
 mariadb-libs.x86_64 1:5.5.56-2.el7

Complete!

啟動mysql
[root@pxc57 ~]# service mysql start

Redirecting to /bin/systemctl start mysql.service

第一次啟動mysql時,系統會給一個亂數密碼,不再是給空密碼了
[root@pxc57 ~]# grep 'temporary password' /var/log/mysqld.log

2018-06-12T05:38:12.965266Z 1 [Note] A temporary password is generated for root@localhost: xxxxxx
 

安裝過程中如果出現以下類似的錯誤訊息
Downloading packages:
warning: /var/cache/yum/x86_64/7/percona-release-x86_64/packages/Percona-XtraDB-Cluster-57-5.7.26-31.37.1.el7.x86_64.rpm: Header V4 RSA/SHA256 Signature, key ID 8507efa5: NOKEY
Retrieving key from file:///etc/pki/rpm-gpg/RPM-GPG-KEY-Percona


The GPG keys listed for the "Percona-Release YUM repository - x86_64" repository are already installed but they are not correct for this package.
Check that the correct key URLs are configured for this repository.


 Failing package is: Percona-XtraDB-Cluster-57-5.7.26-31.37.1.el7.x86_64
 GPG Keys are configured as: file:///etc/pki/rpm-gpg/RPM-GPG-KEY-Percona

請先執行以下指令

[root@pxc57 ~]# yum update percona-release
Loaded plugins: fastestmirror
Loading mirror speeds from cached hostfile
 * base: ftp.tc.edu.tw
 * extras: ftp.tc.edu.tw
 * updates: ftp.tc.edu.tw
Resolving Dependencies
--> Running transaction check
---> Package percona-release.noarch 0:0.1-6 will be updated
---> Package percona-release.noarch 0:1.0-11 will be an update
--> Finished Dependency Resolution

Dependencies Resolved

=============================================================================================================================================================================================================================================
 Package                                                     Arch                                               Version                                             Repository                                                          Size
=============================================================================================================================================================================================================================================
Updating:
 percona-release                                             noarch                                             1.0-11                                              percona-release-noarch                                              16 k

Transaction Summary
=============================================================================================================================================================================================================================================
Upgrade  1 Package

Total download size: 16 k
Is this ok [y/d/N]: y
Downloading packages:
Delta RPMs disabled because /usr/bin/applydeltarpm not installed.
percona-release-1.0-11.noarch.rpm                                                                                                                                                                                     |  16 kB  00:00:00
Running transaction check
Running transaction test
Transaction test succeeded
Running transaction
  Updating   : percona-release-1.0-11.noarch                                                                                                                                                                                             1/2
* Enabling the Percona Original repository
<*> All done!
The percona-release package now contains a percona-release script that can enable additional repositories for our newer products.

For example, to enable the Percona Server 8.0 repository use:

  percona-release setup ps80

Note: To avoid conflicts with older product versions, the percona-release setup command may disable our original repository for some products.

For more information, please visit:
  https://www.percona.com/doc/percona-repo-config/percona-release.html

  Cleanup    : percona-release-0.1-6.noarch                                                                                                                                                                                              2/2
  Verifying  : percona-release-1.0-11.noarch                                                                                                                                                                                             1/2
  Verifying  : percona-release-0.1-6.noarch                                                                                                                                                                                              2/2

Updated:
  percona-release.noarch 0:1.0-11

Complete!

undefined
PHP、MySQL與JavaScript學習手冊(第五版)
Learning PHP, MySQL & JavaScript, 5th Edition

作者: Robin Nixon  
譯者: 賴屹民
出版社:歐萊禮 


文章標籤

helloworld 發表在 痞客邦 留言(0) 人氣()

如果要搜尋一個欄位裡面有沒有特定關鍵字
常用的sql語法是
select id from books where title like '%快快樂樂學%';

聽說有幾個替代語法效能會比較好
1. SELECT id from books where instr(title,'快快樂樂學')>0;

2. select id from books where locate ('快快樂樂學',title)>0;

3. SELECT id from books where position('快快樂樂學' IN title);

但是實際測試過,其實差不多
不知道是我的資料不適合還是機器效能也有差...orz

undefined
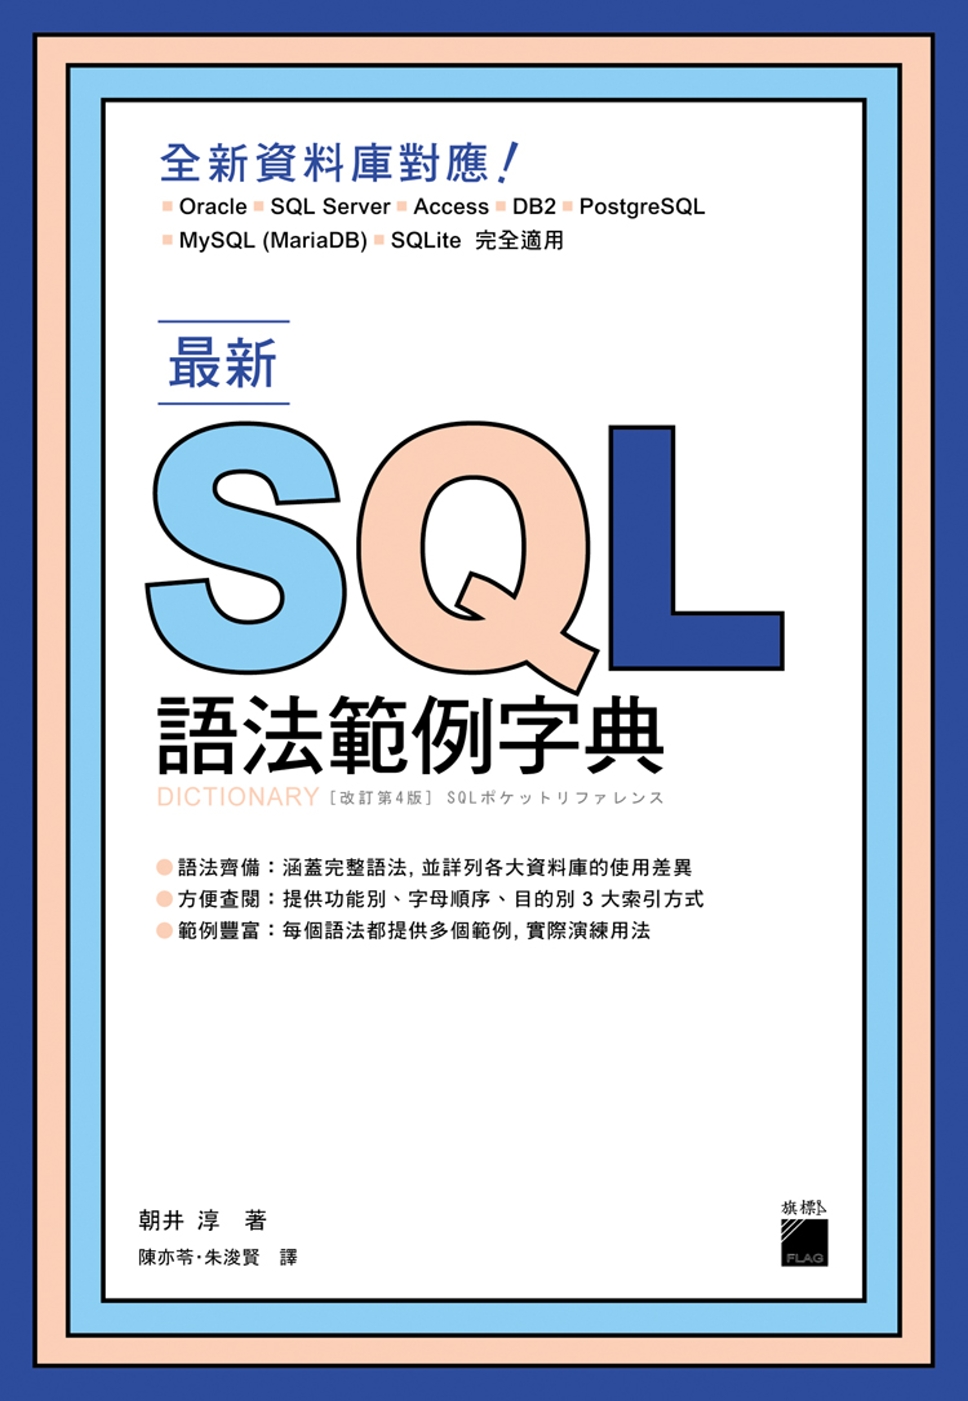
最新SQL語法範例字典

作者: 朝井淳  
譯者: 陳亦苓, 朱浚賢
出版社:旗標  
出版日期:2017/12/12
語言:繁體中文
定價:580元

文章標籤

helloworld 發表在 痞客邦 留言(0) 人氣()

mysql> SHOW VARIABLES LIKE "%version%";
 

文章標籤

helloworld 發表在 痞客邦 留言(0) 人氣()

觀察mysql server 的 netstat
tcp4       0      0 127.0.0.1.3306         *.*                    LISTEN
發現只listen 127.0.0.1:3306
所以當然都不能從遠端登入

因為安裝好的預設設定檔是
bind-address                    = 127.0.0.1
編輯 my,cnf 找到上面這一個參數註記掉,然後重啟mysql server 即可
#bind-address                    = 127.0.0.1
undefined
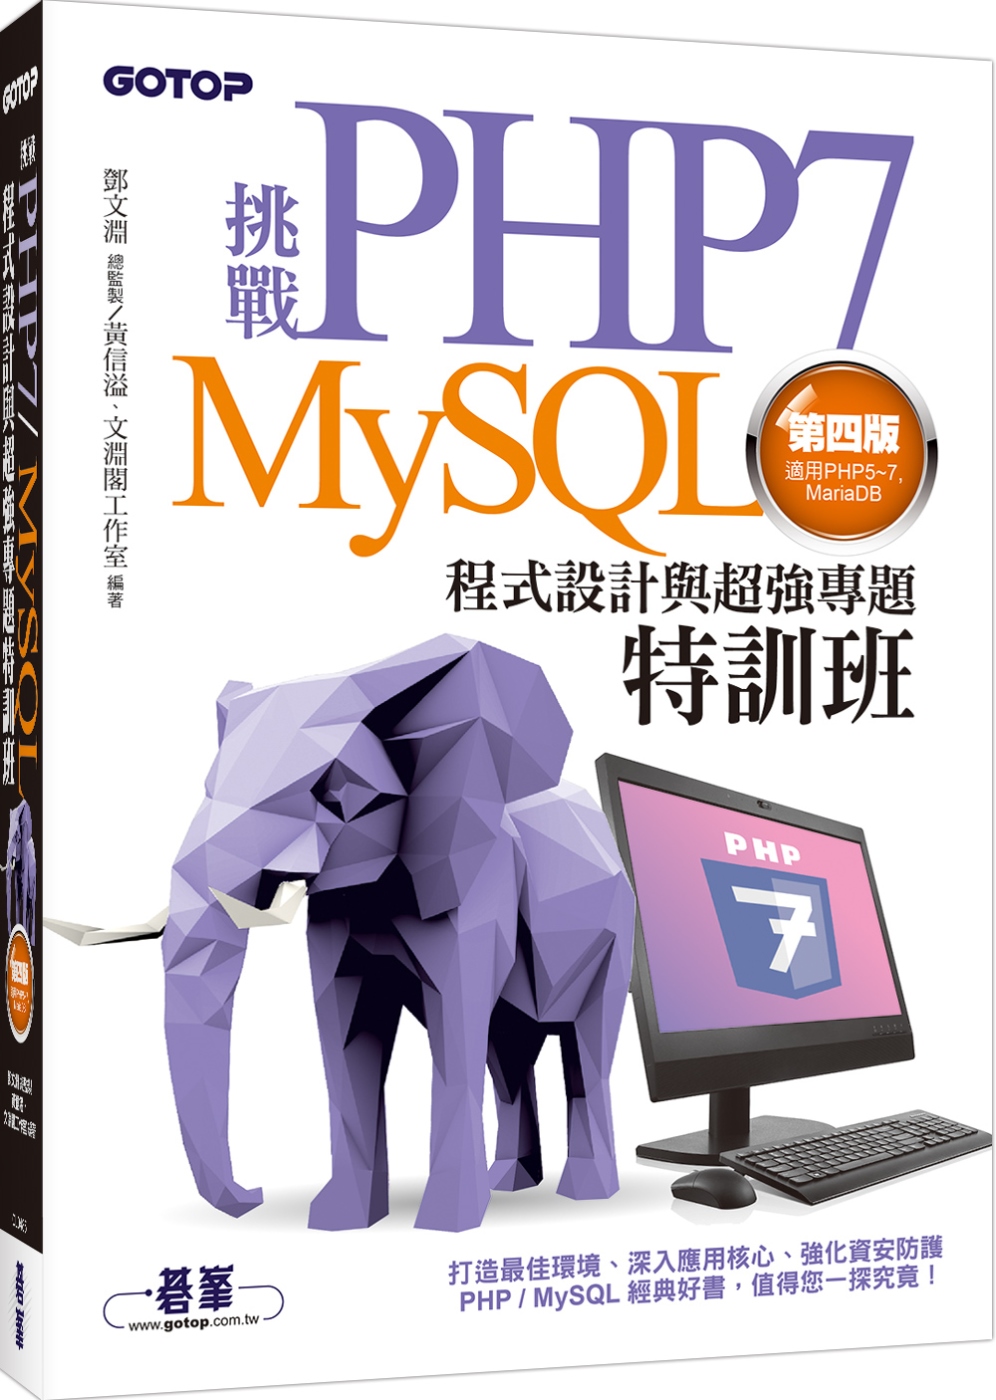
挑戰PHP7/MySQL程式設計與超強專題特訓班(第四版)(適用PHP5~7,MariaDB)

文章標籤

helloworld 發表在 痞客邦 留言(0) 人氣()

雖然說事出必有因
但是如果真的找不出因或是暫時沒心情找原因
可以參考以下作法
1. 暫時讓使用者無法連上 db (用防火牆阻擋、把密碼先改掉、停掉所有ap服務...很多很多方法,挑自己適用的)
2. 從 master把 異常的 table dump 出來
3. 在 master db 把 table 改名,心臟夠力的可以直接 drop
4. 把剛剛dump出來的資料load回去
5. 剛剛的3,4步驟會寫入 binlog, 經由 replication 的機制同步到slave
6. 測試異動一筆資料看看
7. 將步驟1做的動作復原
8. 收工

文章標籤

helloworld 發表在 痞客邦 留言(0) 人氣()

master 10.0.0.100
slave 10.0.0.200

*** master ***

# vi /etc/my.cnf
server-id = 100
log_bin /var/lib/mysql/mysql-bin.log

# /etc/init.d/mysqld restart

# mysql -u root -pxxx
mysql> GRANT REPLICATION SLAVE ON *.* TO 'repl'@'%' IDENTIFIED BY 'passw0rd';

mysql> FLUSH TABLES WITH READ LOCK;
Query OK, 0 rows affected (0.00 sec)

mysql> SHOW MASTER STATUS;
+------------------+----------+--------------+------------------+
| File | Position | Binlog_Do_DB | Binlog_Ignore_DB |
+------------------+----------+--------------+------------------+
| mysql-bin.000001 | 251 | | |
+------------------+----------+--------------+------------------+
1 row in set (0.00 sec)
//remember the position

# mysqldump -u root -pxxxx --all-databases > all-databases.sql;

mysql> UNLOCK TABLES;
Query OK, 0 rows affected (0.00 sec)


*** slave ***
# scp login@10.0.0.100:all-databases.sql .

# vi /etc/my.cnf
server-id = 200
log_bin = /var/lib/mysql/mysql-bin.log

# /etc/init.d/mysql restart

# mysql -u root -pxxxx < all-databases.sql

mysql -u root -pxxxx
mysql> CHANGE MASTER TO
> MASTER_HOST='10.0.0.100',
> MASTER_USER='repl',
> MASTER_PASSWORD='passw0rd',
> MASTER_LOG_FILE='mysql-bin.000001',
> MASTER_LOG_POS=251;

mysql> START SLAVE;

文章標籤

helloworld 發表在 痞客邦 留言(0) 人氣()

#新安裝mysql, 修改root密碼
mysqladmin -u root password 'rootpass'

#建立資料庫,名稱為db1
create database db1;

#建立使用者 webap
CREATE USER 'webap'@'localhost' IDENTIFIED BY 'webpass';

#讓 webap 有權限可以存取 db1
GRANT ALL ON db1.* TO 'webap'@'localhost';

#my.cnf 的路徑
/usr/local/libexec/mysqld --help --verbose

./libexec/mysqld Ver 5.5.44-MariaDB for FreeBSD9.3 on amd64 (FreeBSD Ports)
Copyright (c) 2000, 2015, Oracle, MariaDB Corporation Ab and others.

Starts the MariaDB database server.

Usage: ./libexec/mysqld [OPTIONS]

Default options are read from the following files in the given order:
/usr/local/etc/my.cnf /usr/local/etc/mysql/my.cnf ~/.my.cnf

# innodb預設會將所有table的data及index儲存在ibdata1,時間一久這個檔案就會變得很大,建議可以將每個table分開儲存
1. 備份所有資料庫
mysqldump -u root -prootpw --all-databases > all-db.sql
2. 關閉mysql
mysqladmin -u root -prootpw shutdown
3. 編輯my.cnf
[mysqld]
innodb_file_per_table=1
4. rm ibdata1
5. 匯入資料庫
mysql -u root -prootpw < all-db.sql
6. 檢查檔案
確定每一個table是否有多出一個*.idb的檔案
table1.frm
table1.idb

# mysqldump 時讓每一筆record都是一個insert語法
mysqldump時預會把一個table裡面的資料塞成同一個insert語法,如果要讓每一筆紀錄都是一行insert時
加上 --skip-extended-insert 參數即可

#mysqldump 也可以下where 條件
example: mysqldump -u root -p mysql user --where="user='root'"

#某先狀況下,修改使用者權限,但未生效,可以重新載入權限
FLUSH PRIVILEGES ;

#動態修改mysql參數,但重啟後參數會恢復到預設值

SET GLOBAL character_set_database = 'utf8';
SET GLOBAL character_set_server = 'utf8';
SET GLOBAL collation_database = 'utf8_general_ci';
SET GLOBAL collation_server = 'utf8_general_ci';

# 鎖定資料表,防止寫入
FLUSH TABLES WITH READ LOCK;

# 解除鎖定
UNLOCK TABLES;

#mysqldump 但不包含某個table
 mysqldump -u root -p database_name --ignore-table=database_name.story

(未完成)

文章標籤

helloworld 發表在 痞客邦 留言(0) 人氣()

當我們在php裡面要建立一個sybase資料庫的連線時
$link = sybase_connect ("server","login","password");
會出現 Warning: Sybase: Server message: Changed database context to 'master' 這樣的訊息
通常我們第一個反應是,在sybase_connect前面加個 @就好啦
如 $link = @sybase_connect ("server","login","password");

但是其實還有另一個做法
http://tw2.php.net/manual/en/function.sybase-min-client-severity.php

文章標籤

helloworld 發表在 痞客邦 留言(0) 人氣()

(SizeofDatabase * NumberOfReplicas * 1.1 ) / NumberOfDataNodes

MySQL官方資料 : http://dev.mysql.com/doc/refman/5.0/fr/mysql-cluster-faq.html

helloworld 發表在 痞客邦 留言(0) 人氣()

ERROR 1214 (HY000)  The used table type doesn't support FULLTEXT indexes
不可以有FULLTEXT index

ERROR 1118 (42000)  Row size too large. The maximum row size for the used table type, not counting BLOBs, is 8052. You have to change some columns to TEXT or BLOBs
欄位長度總和不能過長
測試新增一個ndbcluster的table ...裡面只有一個欄位,最大的長度到
varchar (2680)而以,再大就過不去了 >_<

helloworld 發表在 痞客邦 留言(0) 人氣()

mgm node看起來沒什麼load,決定把他加上sql node的群組

[root@node1 ~]# vi /var/lib/mysql-cluster/config.ini
[mysqld]
hostname=10.0.0.102
id=2
[mysqld]
hostname=10.0.0.101
id=11

[root@node1 ~]# vi /etc/my.cnf
[mysqld]
ndbcluster # run NDB storage engine
ndb-connectstring=node1
[mysql_cluster]
ndb-connectstring=node1

ndb服務shutdown (補充說明一下,這個動作可以把ndb_mgmd & ndbd 都shutdown , mysqld 不會shutdown)
[root@node1 ~]# ndb_mgm -e shutdown

重新再讀一次設定檔
[root@node1 ~]# ndb_mgmd -f /var/lib/mysql-cluster/config.ini --initial

再去data node 把ndbd帶起來

最後把sql node的mysqld 帶起來,當然包括剛剛加上去的node1
[root@node1 ~]# service mysql start

觀察一下目前cluster的狀態
[root@node1 ~]# ndb_mgm -e show
Connected to Management Server at: node1:1186
Cluster Configuration
---------------------
[ndbd(NDB)]     2 node(s)
id=3    @10.0.0.103  (mysql-5.1.44 ndb-7.1.4, Nodegroup: 0, Master)
id=4    @10.0.0.104  (mysql-5.1.44 ndb-7.1.4, Nodegroup: 0)

[ndb_mgmd(MGM)] 1 node(s)
id=1    @10.0.0.101  (mysql-5.1.44 ndb-7.1.4)

[mysqld(API)]   2 node(s)
id=2    @10.0.0.102  (mysql-5.1.44 ndb-7.1.4)
id=11   @10.0.0.101  (mysql-5.1.44 ndb-7.1.4)

最後如果可以讀到在其他sql node建立起來的資料的話就是成功囉!!
mysql> select * from table1;
+------+
| a    |
+------+
|    1 |
|    2 |
+------+
2 rows in set (0.01 sec)


helloworld 發表在 痞客邦 留言(0) 人氣()

將MyISAM的table格式轉換為cluster格式
mysql> ALTER TABLE table1 ENGINE=NDBCLUSTER;
Query OK, 2 rows affected (0.96 sec)
Records: 2  Duplicates: 0  Warnings: 0

mysql> show create table `table1`;
+--------+------------------------------------
| Table  | Create Table
+--------+------------------------------------
| table1 | CREATE TABLE `table1` (
  `a` int(11) DEFAULT NULL
) ENGINE=ndbcluster DEFAULT CHARSET=latin1 |
+--------+------------------------------------
1 row in set (0.01 sec)

-rw-rw---- 1 mysql mysql 8554 Aug 11 15:34 table1.frm
-rw-rw---- 1 mysql mysql    0 Aug 11 15:34 table1.ndb
-rw-rw---- 1 mysql mysql 8554 Aug 11 15:05 table2.frm
-rw-rw---- 1 mysql mysql    0 Aug 11 15:05 table2.ndb

helloworld 發表在 痞客邦 留言(0) 人氣()

開始建table囉
首先看看有沒有支援ndbcluster
mysql> show engines;
| ndbcluster | YES .... (略)

mysql> use test;

以前會醬子create table
mysql> create table `table1` (a int);
Query OK, 0 rows affected (0.06 sec)

現在你要醬子create table
mysql> create table `table2` (a int) ENGINE=ndbcluster;
Query OK, 0 rows affected (0.73 sec)

實際到os下面看看檔案格式有什麼不一樣
-rw-rw---- 1 mysql mysql 8554 Aug 11 14:59 table1.frm
-rw-rw---- 1 mysql mysql    0 Aug 11 14:59 table1.MYD
-rw-rw---- 1 mysql mysql 1024 Aug 11 14:59 table1.MYI
-rw-rw---- 1 mysql mysql 8554 Aug 11 15:05 table2.frm
-rw-rw---- 1 mysql mysql    0 Aug 11 15:05 table2.ndb

塞幾筆資料進去看看
mysql> insert table1 values (1);
mysql> insert table1 values (2);
mysql> insert table2 values (1);
mysql> insert table2 values (2);

mysql> select * from table1;
+------+
| a    |
+------+
|    1 |
|    2 |
+------+
2 rows in set (0.00 sec)

mysql> select * from table2;
+------+
| a    |
+------+
|    1 |
|    2 |
+------+
2 rows in set (0.00 sec)

再看一下檔案有甚麼不一樣
-rw-rw---- 1 mysql mysql 8554 Aug 11 14:59 table1.frm
-rw-rw---- 1 mysql mysql   14 Aug 11 15:07 table1.MYD
-rw-rw---- 1 mysql mysql 1024 Aug 11 15:07 table1.MYI
-rw-rw---- 1 mysql mysql 8554 Aug 11 15:05 table2.frm
-rw-rw---- 1 mysql mysql    0 Aug 11 15:05 table2.ndb

嗯..看起來data都是已經寫到data node去囉:D

helloworld 發表在 痞客邦 留言(0) 人氣()

master 現在是node3
[root@node3 ~]# ndb_mgm -e show
Connected to Management Server at: 10.0.0.101:1186
Cluster Configuration
---------------------
[ndbd(NDB)]     2 node(s)
id=3    @10.0.0.103  (mysql-5.1.44 ndb-7.1.4, Nodegroup: 0, Master)
id=4    @10.0.0.104  (mysql-5.1.44 ndb-7.1.4, Nodegroup: 0)

[ndb_mgmd(MGM)] 1 node(s)
id=1    @10.0.0.101  (mysql-5.1.44 ndb-7.1.4)

[mysqld(API)]   1 node(s)
id=2    @10.0.0.102  (mysql-5.1.44 ndb-7.1.4)

試試模擬node3的ndbd掛掉的時候看看會怎樣
[root@node3 ~]# killall ndbd

node4接手變成master了
[root@node3 ~]# ndb_mgm -e show
Connected to Management Server at: 10.0.0.101:1186
Cluster Configuration
---------------------
[ndbd(NDB)]     2 node(s)
id=3 (not connected, accepting connect from 10.0.0.103)
id=4    @10.0.0.104  (mysql-5.1.44 ndb-7.1.4, Nodegroup: 0, Master)

[ndb_mgmd(MGM)] 1 node(s)
id=1    @10.0.0.101  (mysql-5.1.44 ndb-7.1.4)

[mysqld(API)]   1 node(s)
id=2    @10.0.0.102  (mysql-5.1.44 ndb-7.1.4)

重啟在node3啟動ndbd後會怎樣咧??
[root@node3 ~]# ndb_mgm -e show
Connected to Management Server at: 10.0.0.101:1186
Cluster Configuration
---------------------
[ndbd(NDB)]     2 node(s)
id=3    @10.0.0.103  (mysql-5.1.44 ndb-7.1.4, starting, Nodegroup: 0)
id=4    @10.0.0.104  (mysql-5.1.44 ndb-7.1.4, Nodegroup: 0, Master)

[ndb_mgmd(MGM)] 1 node(s)
id=1    @10.0.0.101  (mysql-5.1.44 ndb-7.1.4)

[mysqld(API)]   1 node(s)
id=2    @10.0.0.102  (mysql-5.1.44 ndb-7.1.4)

[root@node3 ~]# ndb_mgm -e show
Connected to Management Server at: 10.0.0.101:1186
Cluster Configuration
---------------------
[ndbd(NDB)]     2 node(s)
id=3    @10.0.0.103  (mysql-5.1.44 ndb-7.1.4, Nodegroup: 0)
id=4    @10.0.0.104  (mysql-5.1.44 ndb-7.1.4, Nodegroup: 0, Master)

[ndb_mgmd(MGM)] 1 node(s)
id=1    @10.0.0.101  (mysql-5.1.44 ndb-7.1.4)

[mysqld(API)]   1 node(s)
id=2    @10.0.0.102  (mysql-5.1.44 ndb-7.1.4)

嗯.. 結論是..node4繼續當他的master ... (筆記)

helloworld 發表在 痞客邦 留言(0) 人氣()

MySQL的cluster主要分為3種node
mgm node 沒錯,照字面上看起來就是管理用的node
sql node 未來查詢都會透過這個node來做增刪改查
data node 存放資料的地方

首先準備4台機器,裝好Linux作業系統,其他套件都不要選
10.0.0.101 (mgm node)
10.0.0.102 (sql node)
10.0.0.103 (data node)
10.0.0.104 (data node)

編輯四台node的/etc/hosts (非必要,只是我的怪僻XD)
10.0.0.101    node1
10.0.0.102    node2
10.0.0.103    node3
10.0.0.104    node4

安裝MySQL Cluster前把iptables / SELinux 都關掉先,會少很多麻煩
如果要關掉SELinux,必須要reboot
chkconfig iptables off
vi /etc/sysconfig/selinux
SELINUX=enforcing 修改為 SELINUX=disabled
reboot

下載需要的套件回來,以下是前幾天下載的7.1.4b,現在最新的版本是7.1.5
http://dev.mysql.com/downloads/cluster/

MySQL-Cluster-gpl-client-7.1.4b-1.rhel5.x86_64.rpm
MySQL-Cluster-gpl-clusterj-7.1.4b-1.rhel5.x86_64.rpm
MySQL-Cluster-gpl-debuginfo-7.1.4b-1.rhel5.x86_64.rpm
MySQL-Cluster-gpl-devel-7.1.4b-1.rhel5.x86_64.rpm
MySQL-Cluster-gpl-embedded-7.1.4b-1.rhel5.x86_64.rpm
MySQL-Cluster-gpl-extra-7.1.4b-1.rhel5.x86_64.rpm
MySQL-Cluster-gpl-management-7.1.4b-1.rhel5.x86_64.rpm
MySQL-Cluster-gpl-server-7.1.4b-1.rhel5.x86_64.rpm
MySQL-Cluster-gpl-shared-7.1.4b-1.rhel5.x86_64.rpm
MySQL-Cluster-gpl-storage-7.1.4b-1.rhel5.x86_64.rpm
MySQL-Cluster-gpl-test-7.1.4b-1.rhel5.x86_64.rpm
MySQL-Cluster-gpl-tools-7.1.4b-1.rhel5.x86_64.rpm

如果不想安裝全部,各Node基本需要的套件如下
mgm node
rpm -ihv MySQL-Cluster-gpl-management*.rpm
rpm -ihv MySQL-Cluster-gpl-tools*.rpm
sql node
rpm -ivh MySQL-Cluster-gpl-server*.rpm
rpm -ivh MySQL-Cluster-gpl-client*.rpm
data node
rpm -ihv MySQL-Cluster-gpl-storage*.rpm

省得麻煩的話,就全裝唄XD

開始設定了,在mgm node
如果沒有/var/lib/mysql-cluster的話就自己建一個目錄
[root@node1 ~]# mkdir -p /var/lib/mysql-cluster
[root@node1 ~]# vi /var/lib/mysql-cluster/config.ini

[ndbd default]
NoOfReplicas=2
DataMemory=80M
IndexMemory=18M
[tcp default]
portnumber=2202
[ndb_mgmd]
hostname=10.0.0.101
id=1
datadir=/var/lib/mysql-cluster
[ndbd]
hostname=10.0.0.104
datadir=/var/lib/mysql-cluster
id=4
[ndbd]
hostname=10.0.0.103
datadir=/var/lib/mysql-cluster
id=3
[mysqld]
hostname=10.0.0.102
id=2

編輯sql node的/etc/my.cnf

[mysqld]
ndbcluster # run NDB storage engine
ndb-connectstring=node1   ##這邊要寫mgm node的位址
[mysql_cluster]
ndb-connectstring=node1   ##這邊要寫mgm node的位址


啟動服務
順序: mgm node -> data node -> sql node
mgm node:
[root@node1 ~]# ndb_mgmd -f /var/lib/mysql-cluster/config.ini --initial (第一次執行要加-f /var/lib/mysql-cluster/config.ini
--initial , 第二次以後就不用了)
觀察一下mysql cluster的狀態,我們可以用以下的指令
[root@node1 ~]# ndb_mgm -e show
Connected to Management Server at: localhost:1186
Cluster Configuration
---------------------
[ndbd(NDB)]     2 node(s)
id=3 (not connected, accepting connect from 10.0.0.103)
id=4 (not connected, accepting connect from 10.0.0.104)

[ndb_mgmd(MGM)] 1 node(s)
id=1    @10.0.0.101  (mysql-5.1.44 ndb-7.1.4)

[mysqld(API)]   1 node(s)
id=2 (not connected, accepting connect from 10.0.0.102)


data node:
ndbd --initial (第一次執行要加 --initial , 第二次以後就不用了)
如果無法啟動的話,可以直接指定他mgm node在哪邊
[root@node3 ~]# ndbd -c node1
[root@node1 ~]# ndb_mgm -e show
Connected to Management Server at: 10.0.0.101:1186
Cluster Configuration
---------------------
[ndbd(NDB)]     2 node(s)
id=3    @10.0.0.103  (mysql-5.1.44 ndb-7.1.4, starting, Nodegroup: 0, Master)
id=4    @10.0.0.104  (mysql-5.1.44 ndb-7.1.4, starting, Nodegroup: 0)

[ndb_mgmd(MGM)] 1 node(s)
id=1    @10.0.0.101  (mysql-5.1.44 ndb-7.1.4)

[mysqld(API)]   1 node(s)
id=2 (not connected, accepting connect from 10.0.0.102)

sql node:
service mysql start (注意!!不是mysqld喔)
最後看看狀態,是不是所有的node都起來了
Connected to Management Server at: node1:1186
Cluster Configuration
---------------------
[ndbd(NDB)]     2 node(s)
id=3    @10.0.0.103  (mysql-5.1.44 ndb-7.1.4, Nodegroup: 0, Master)
id=4    @10.0.0.104  (mysql-5.1.44 ndb-7.1.4, Nodegroup: 0)

[ndb_mgmd(MGM)] 1 node(s)
id=1    @10.0.0.101  (mysql-5.1.44 ndb-7.1.4)

[mysqld(API)]   1 node(s)
id=2    @10.0.0.102  (mysql-5.1.44 ndb-7.1.4)

嗯..看來 data node要的記憶體要大一點.. (筆記)

參考資料:
http://forum.icst.org.tw/phpbb/viewtopic.php?f=10&t=17903
http://twpug.net/docs/mysql-5.1/ndbcluster.html
http://dev.mysql.com/doc/refman/5.1/en/mysql-cluster.html
http://www.codecharge.com.tw/phpBB3/viewtopic.php?f=11&t=540

undefined
MySQL技術精粹:架構、高級特性、性能優化與集群實戰

文章標籤

helloworld 發表在 痞客邦 留言(0) 人氣()

# cd charsets
# charset -Usa -Ppassword -Sserver_name binary.srt big5
# isql
1> use master
2> go
1> sp_configure "default sortorder id",50,"big5"
2> go
1> shutdown
2> go
                                                                               
重新啟動sybase server兩次(第一次一定會失敗),即可

延伸閱讀:新手上路 Sybase Adaptive Server Enterprise(範例光碟)

文章標籤

helloworld 發表在 痞客邦 留言(0) 人氣()

«12 3
Close

您尚未登入,將以訪客身份留言。亦可以上方服務帳號登入留言

請輸入暱稱 ( 最多顯示 6 個中文字元 )

請輸入標題 ( 最多顯示 9 個中文字元 )

請輸入內容 ( 最多 140 個中文字元 )

reload

請輸入左方認證碼:

看不懂,換張圖

請輸入驗證碼